8 Tips to Take Better Pictures by Losing the Background Clutter
Have you ever taken a picture of something or someone, and then seen the final image and thought, “I don’t remember all of that… stuff being behind/in front/around her/him/it”? When we are taking a picture, often we only see the subject because that’s what we are focused on. Unfortunately, the camera sees everything in the frame, and this can result in a cluttered, messy-looking final image. The good news is, there are a lot of easy ways to fix this and take better pictures.
To get started, you have two basic options to reduce distracting backgrounds: blur out or crop out the unwanted stuff. Below are a few ways to do both (with limited tech-speak). Take a look at the ideas below, and pick one or two to memorize and use next time you’re taking a shot at a dinner table, or the pool, or a party… really, anywhere there is a lot going on that could take away from who the picture is really about.
Option 1:
Blur Unwanted Stuff Out of the Background
When you make the items in the background blurry, they catch the eye less in your final image. Hence, blurry background = less distracting. One gotcha to keep in mind; if you have multiple subjects, make sure they are on the same “plane,” or about the same distance from the camera. Otherwise some of them may end up out of focus like the background. Here are a couple of ways to change your depth of field so you can blur out the cluttered areas:
1. Distance between camera and subject
The closer your subject is to your camera, the less of your image will be in focus. By making the camera focus on something closer to it, it cannot keep as much of the image in focus. Voila, instant background blur.
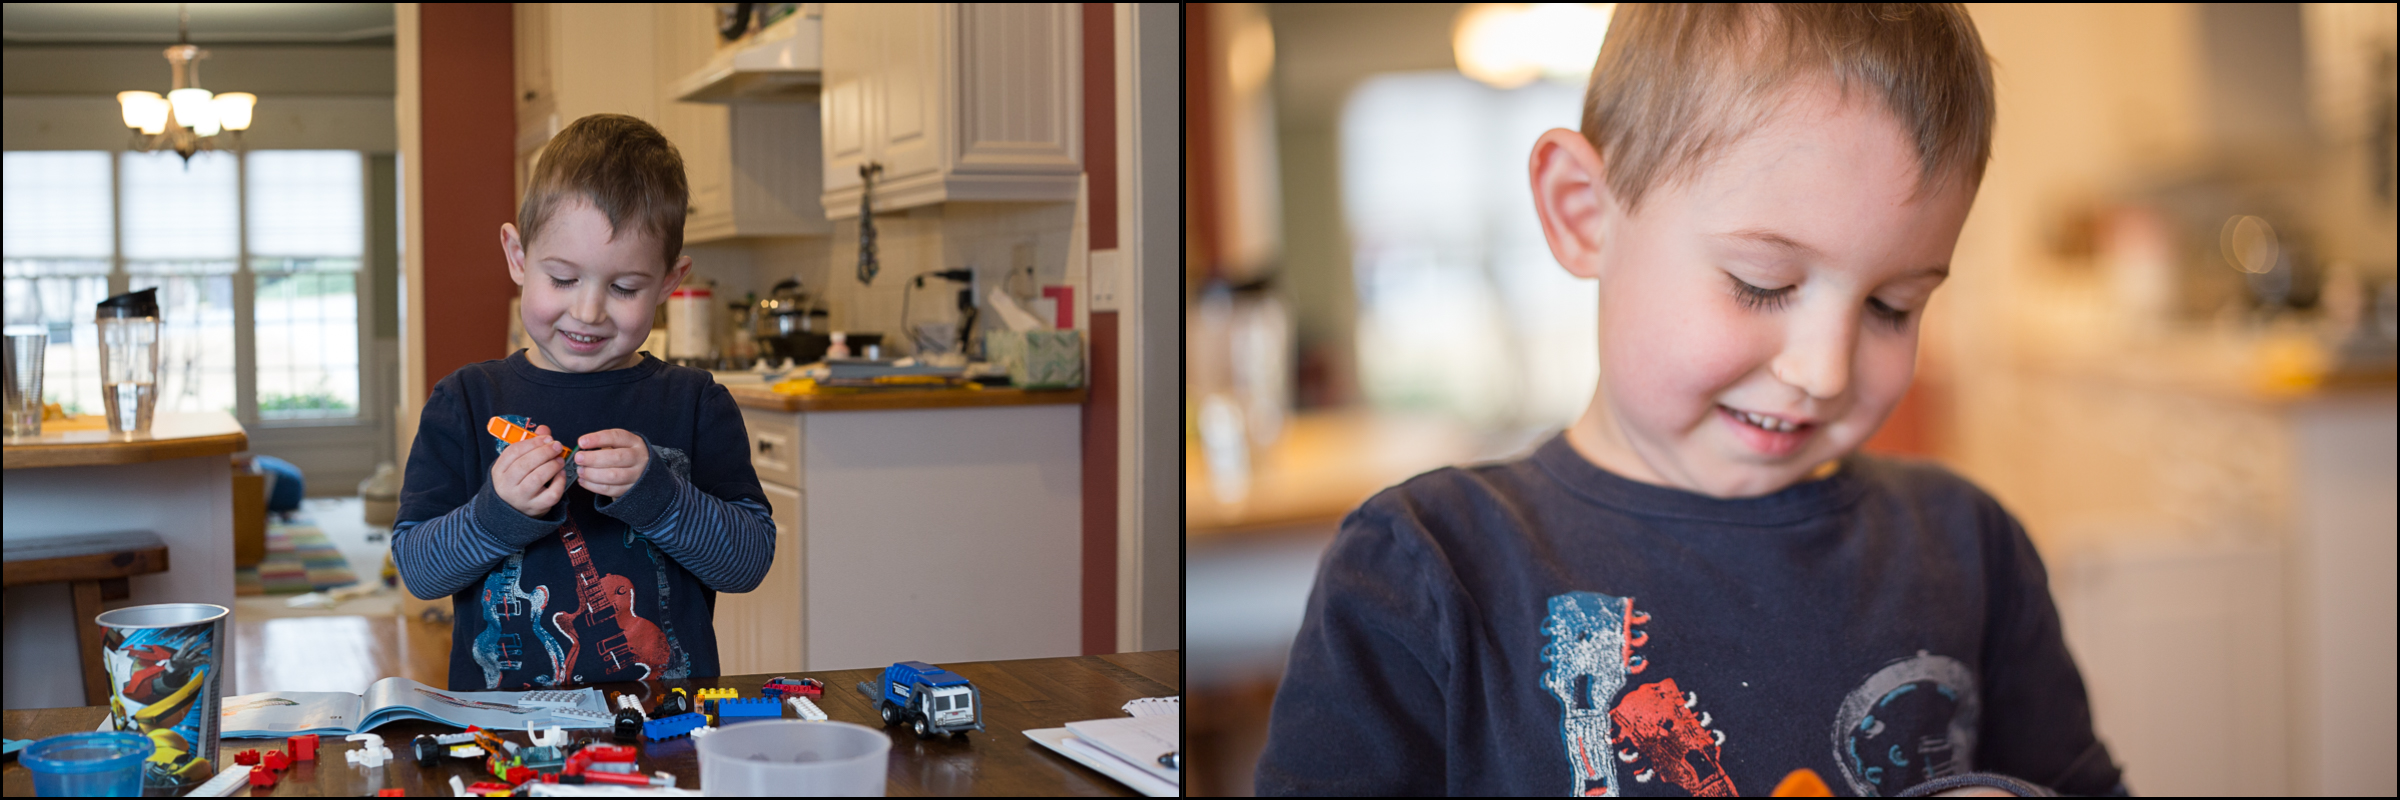
I started about five feet away in the shot on the left, and got right up in his grill, about 1.5 feet away, for the one on the right.
2. Step Back and Zoom
If your camera has optical zoom, zoom in as tight as you can. Step back further if part of your subject is cut out of the image, and keep zooming. The further you zoom, the less of your image will be in focus.
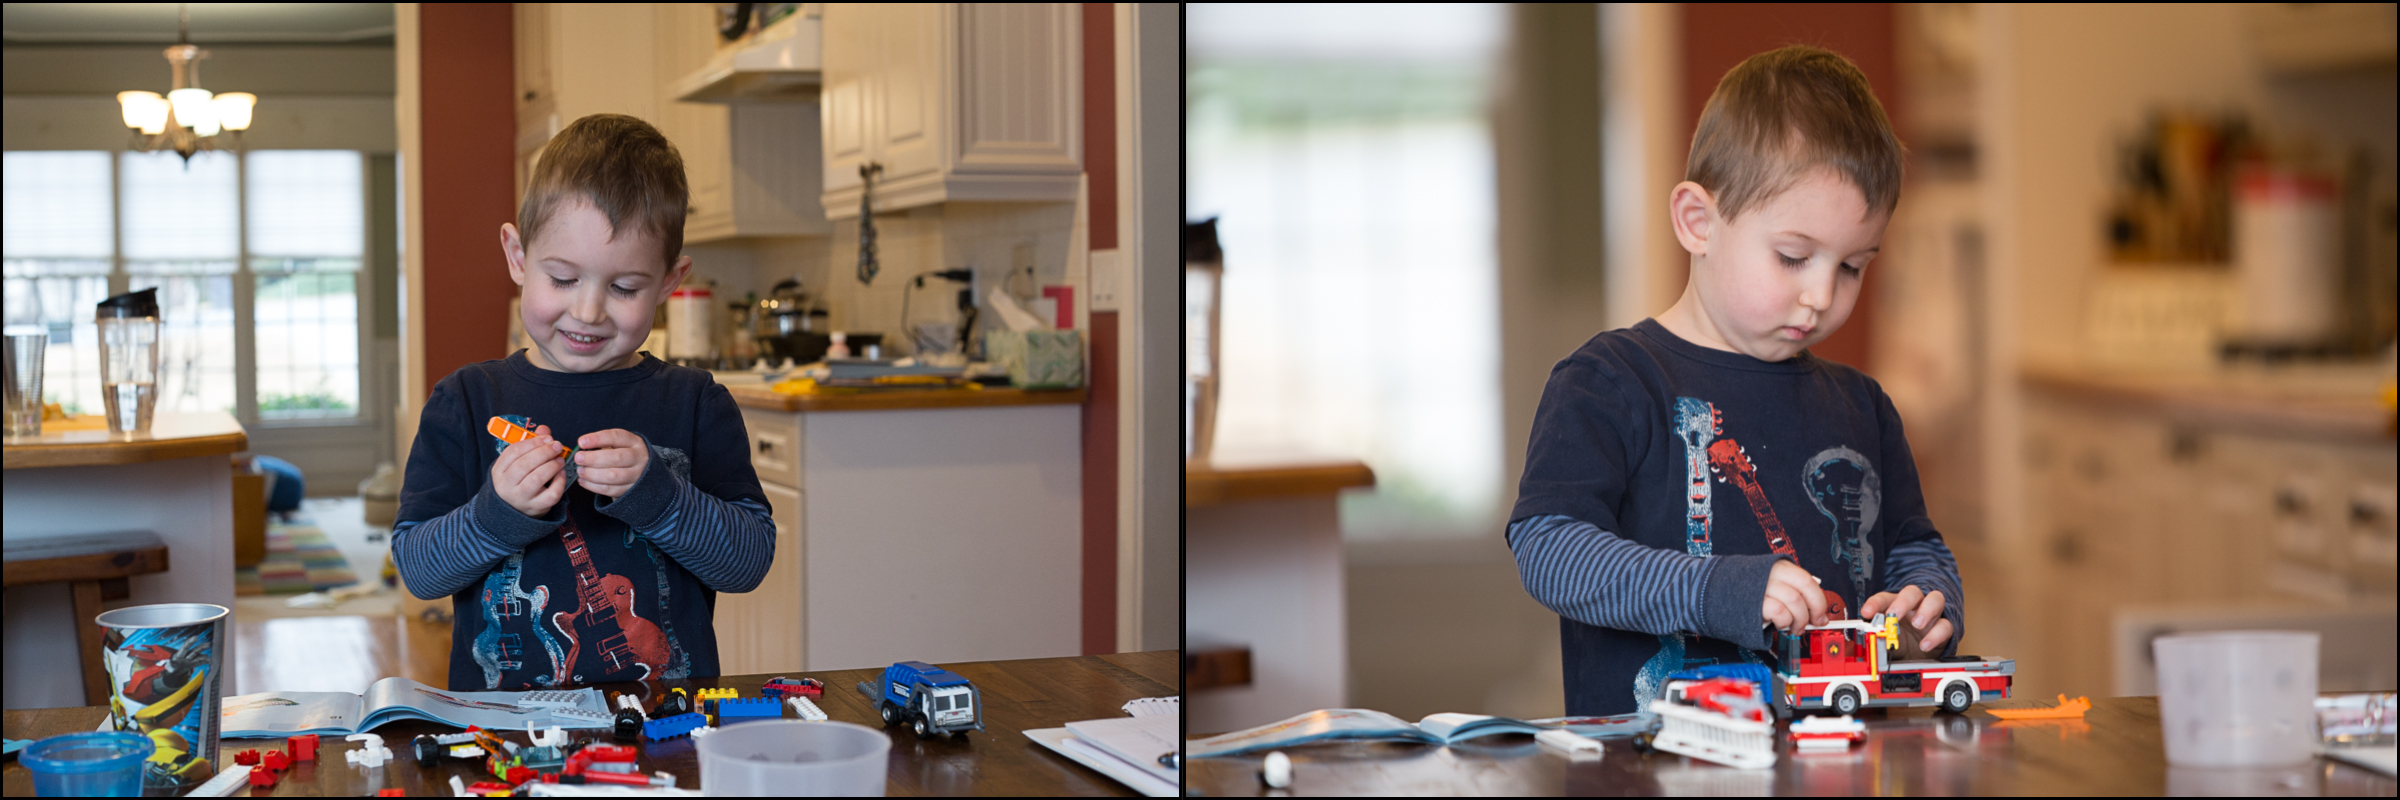
For this image, I went from a 50mm zoom to 200mm (200 magnifies the subject, just like looking through a pair of binoculars), and moved myself back about ten feet to keep the same framing. Without stepping back, this would have given me a lovely shot of the tip of his nose.

Albert Einstein
Out of clutter, find simplicity.
3. Aperture
Set it to a low number. The simplest way to think about it is, the smaller the number, the blurrier the background. If your camera lets you set the aperture, set it for one of the lowest settings.
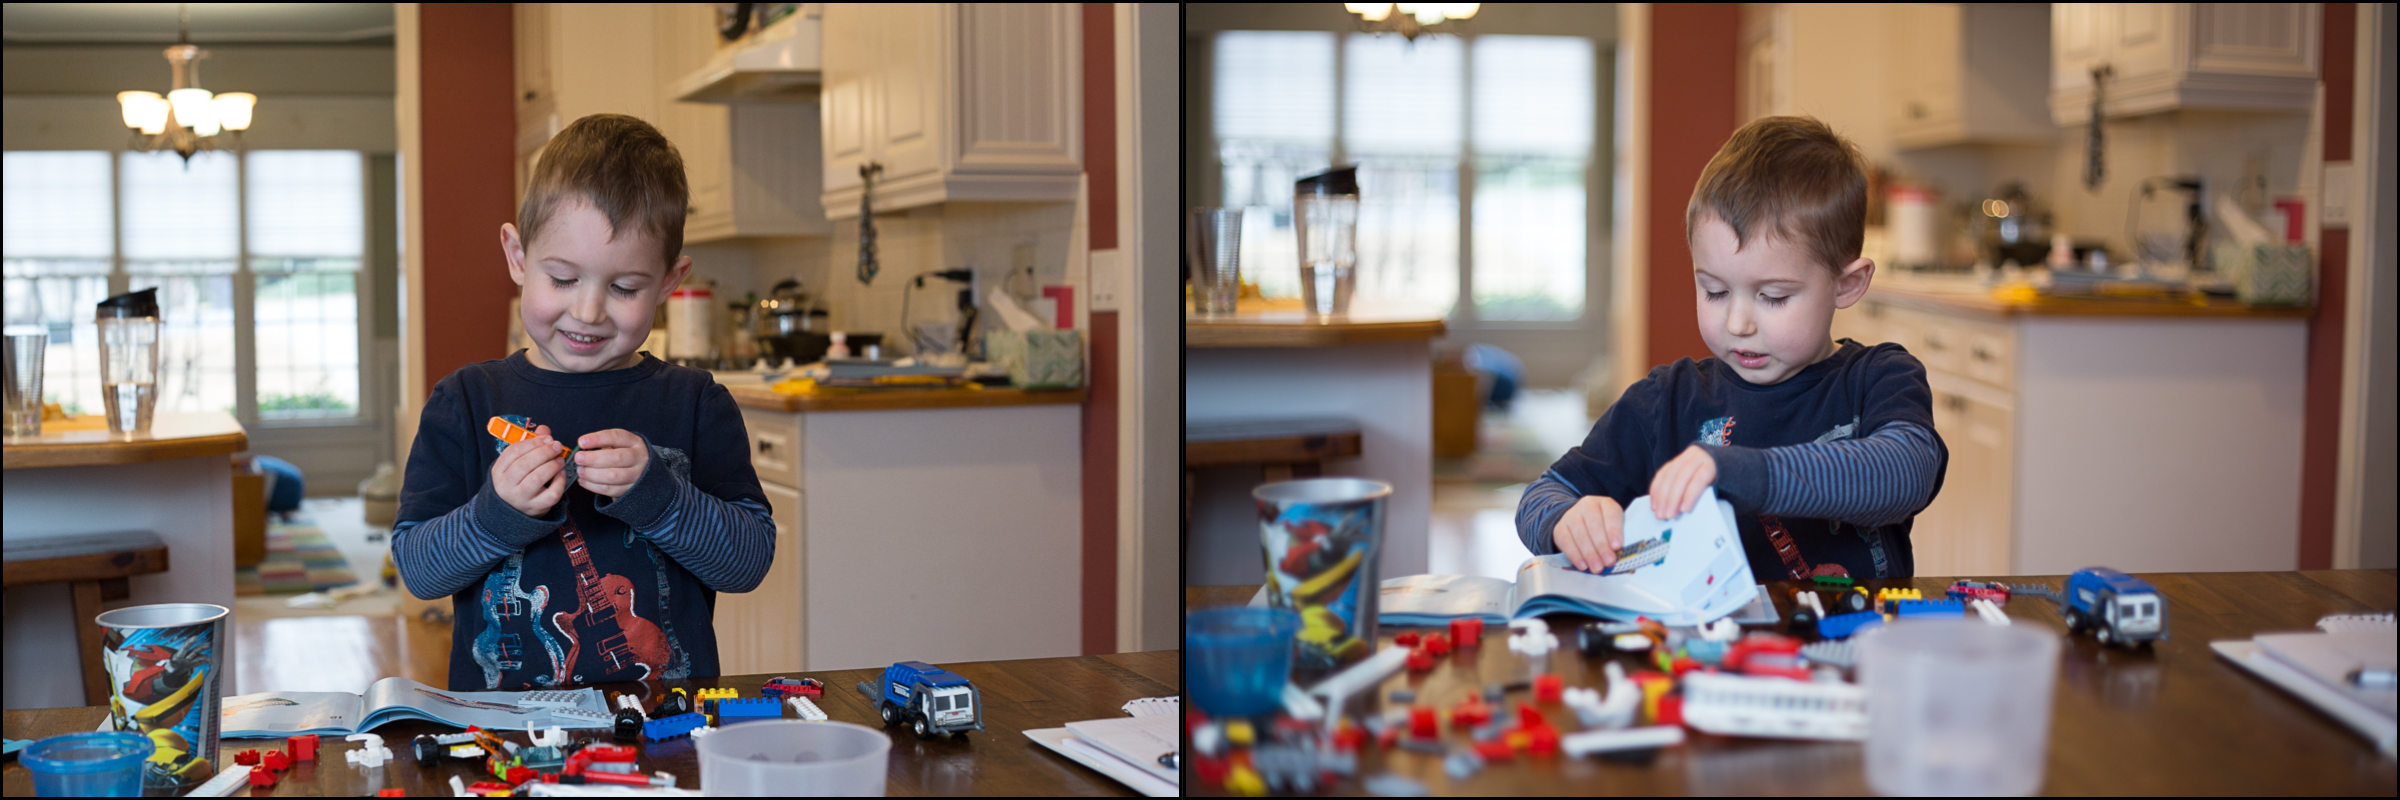
The left image was shot at f5.0, which has a little bit of blur in the background. The right is “wide open,” or the lens’s widest aperture, at f1.8.
Option 2:
Cut Unwanted Stuff Out of the Background
4. Zoom in Tight
Zooming in cuts unwanted items out of the image by cutting in closer to your subject and eliminating the area around them from the image. Zoom with your lens or your feet to crop in closer around your subject.

This was shot with a prime lens (a “non-zoom-able” lens), so I zoomed with my feet (walked closer) to get in nice and close.
5. Find a Different Perspective
Get low or get high. Getting above your subject switches the eye level background for whatever is beneath their feet. If it’s a background that works, take the shot from above. If not, try getting low and putting the sky/trees/ceiling behind them.
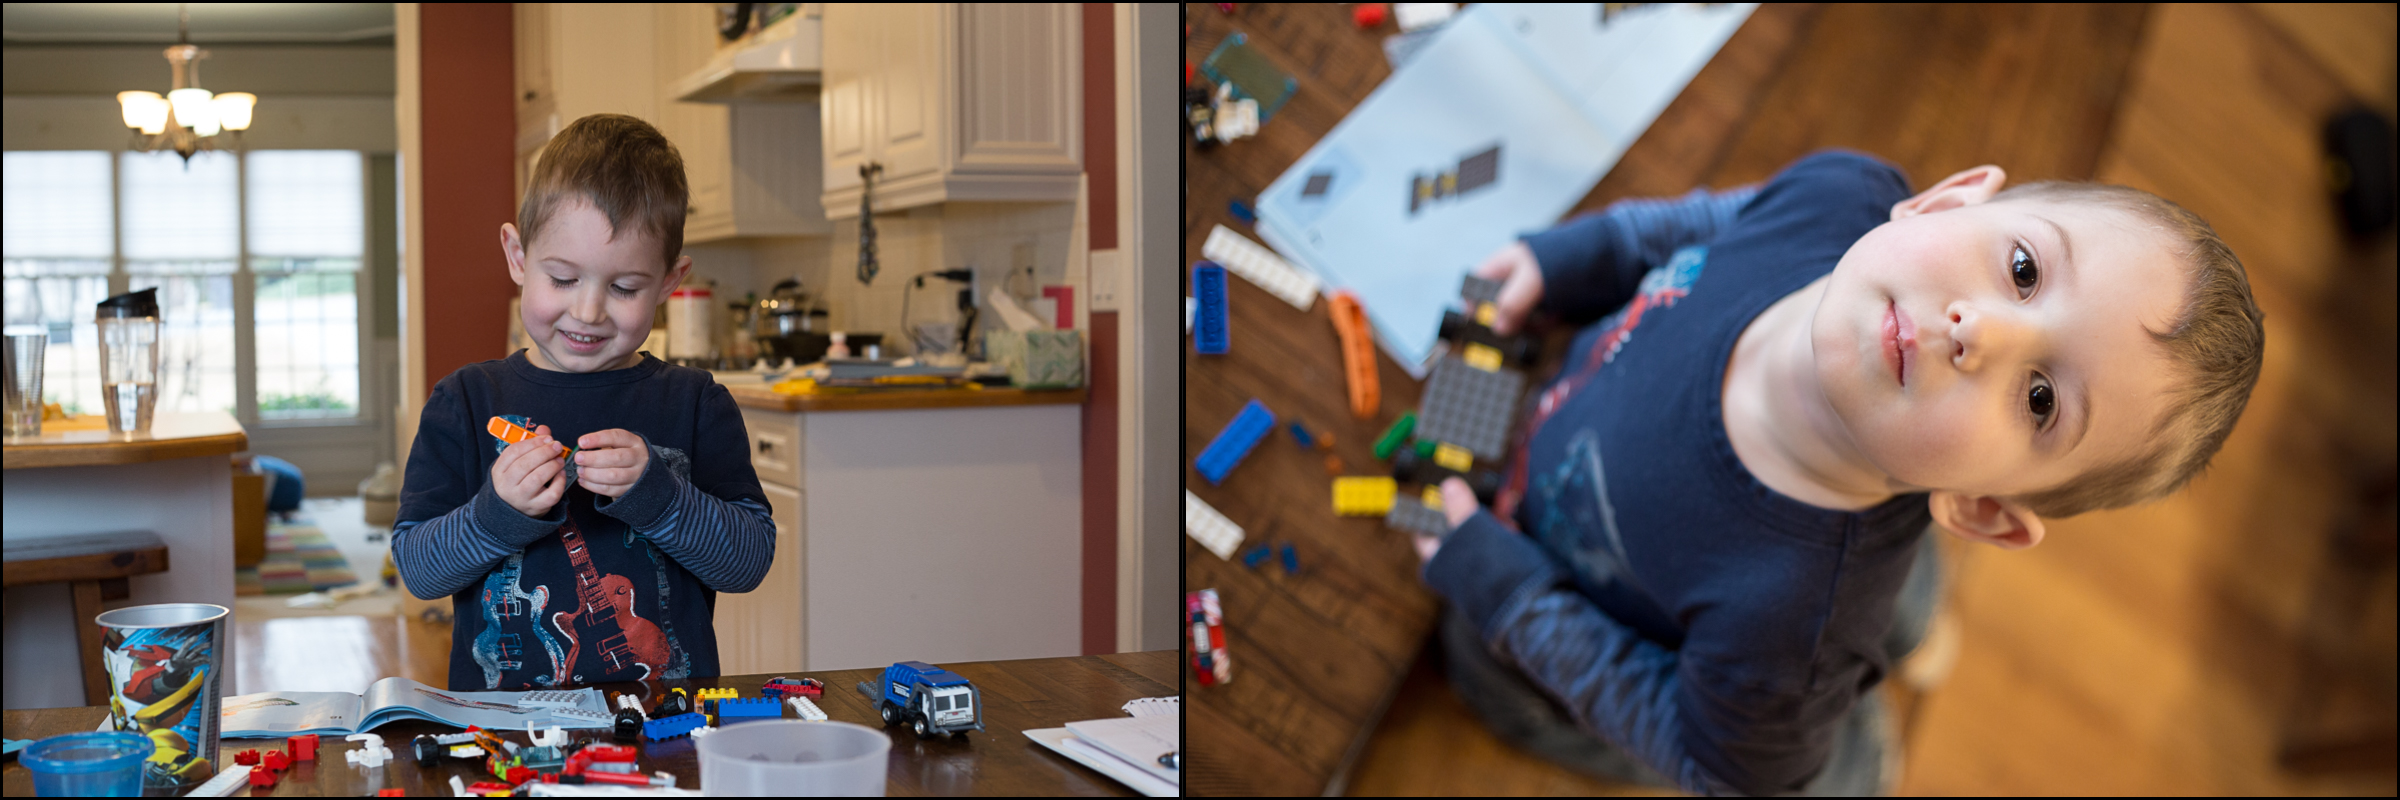
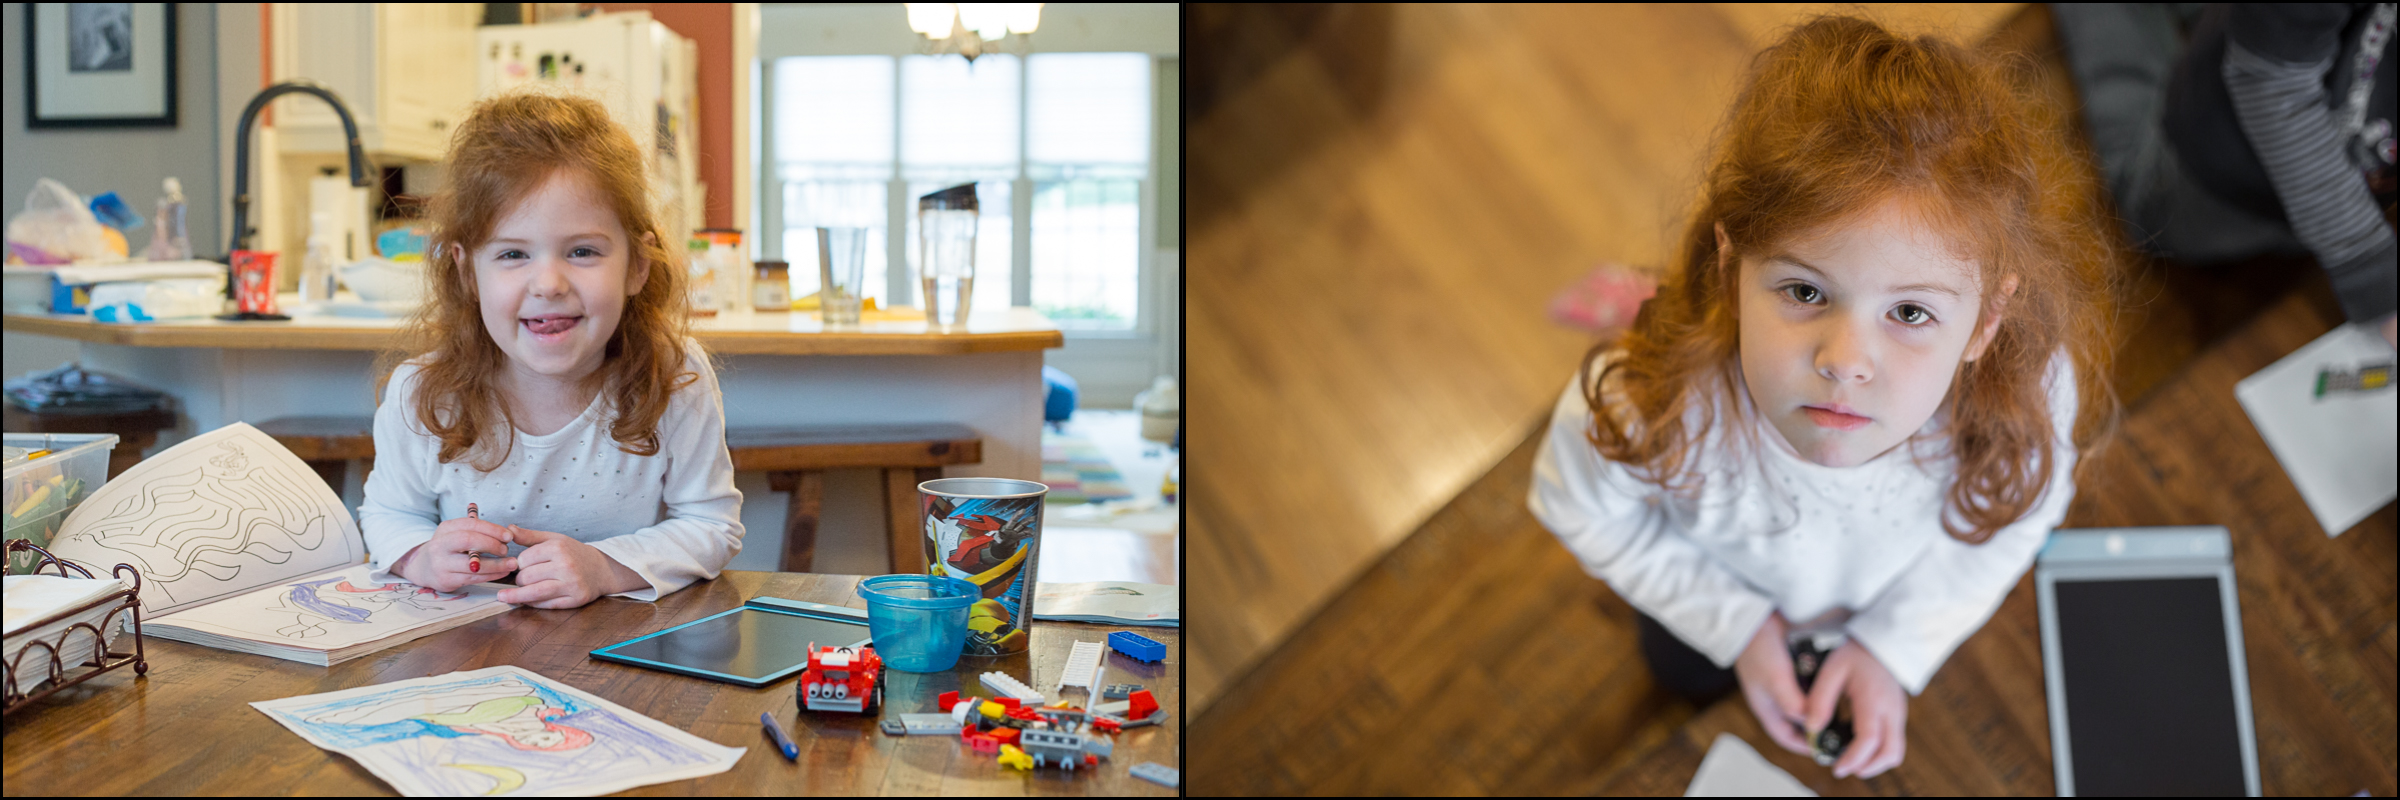
For these I hopped up on a chair and the table, respectively (and received a stern lecture about standing on chairs… turns out they are listening).
Clutter is not a property of information. Clutter is a failure of design.
– Edward Tuft
6. Move Yourself
Step left or right until the background contains less clutter. It’s amazing how often this super simple option works if you just remember to try it.
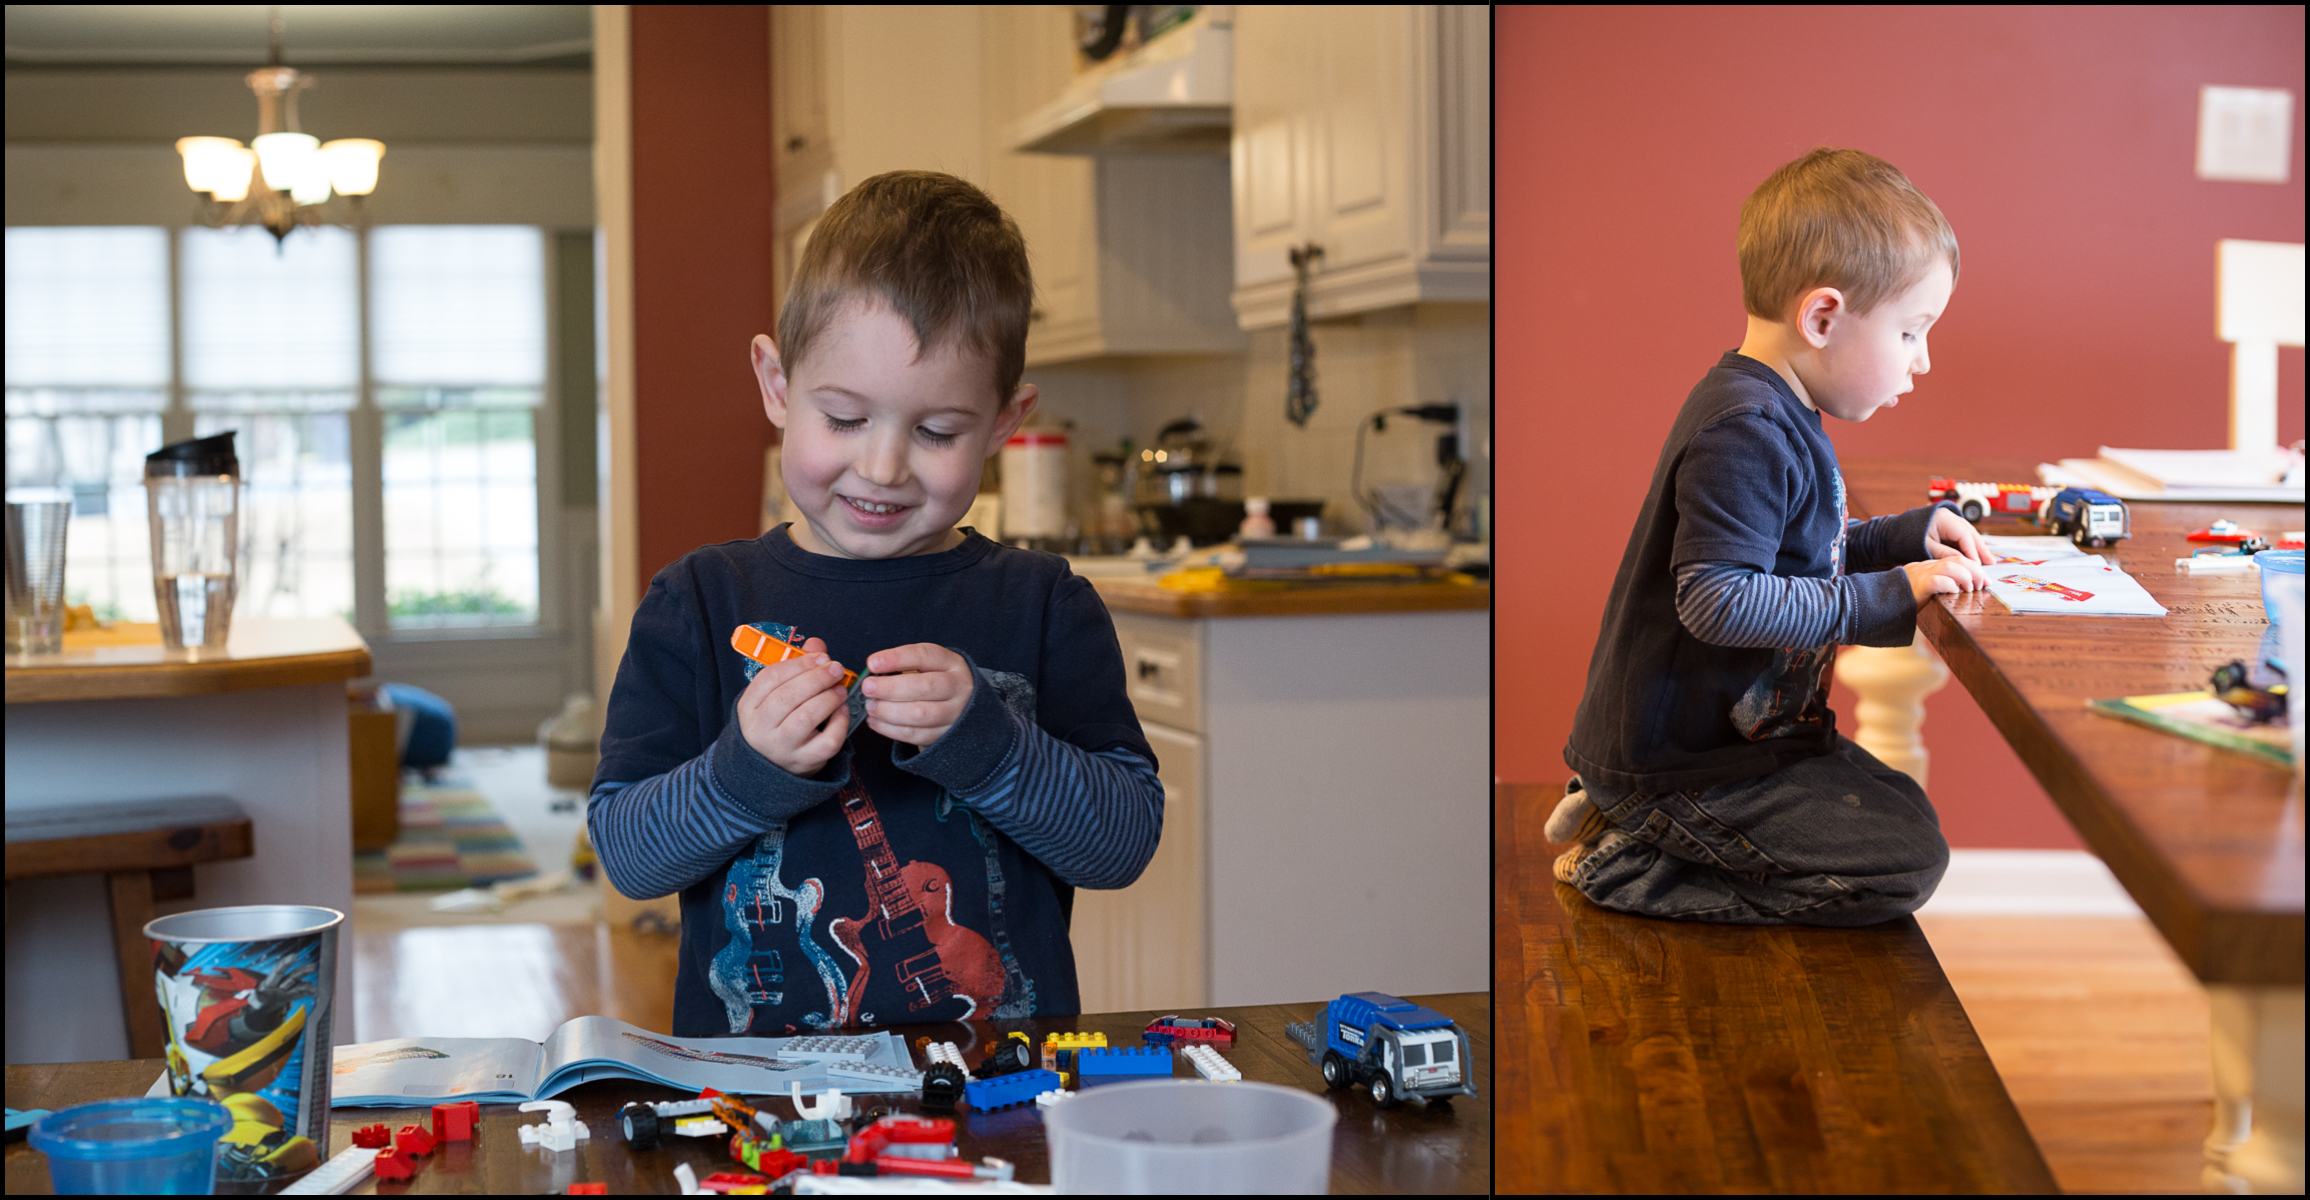
Taking a side angle put a plain wall in the background, which frames him nicely and gets rid of the background mess.
7. Move Your Subject
If you cannot get a good angle where they are, scooch your subject left or right until what is behind them is less busy.

Sometimes it’s easier to just ask them to move. You nice people will scooch, won’t you?
8. Move Objects
If the distracting clutter is easily moved, then for goodness sakes, move it out of the shot. For example, if you’re taking a picture at a restaurant, move used plates and glasses to the side so they don’t create a messy, distracting foreground of half-finished food and drink.
So there you have it. These are all ways to take better pictures by removing the clutter “in camera,” which is easier than the other option (after the fact, with editing). I’ll cover those techniques in an upcoming post, so keep an eye out if you want some tips on how to save an existing image from too much clutter.
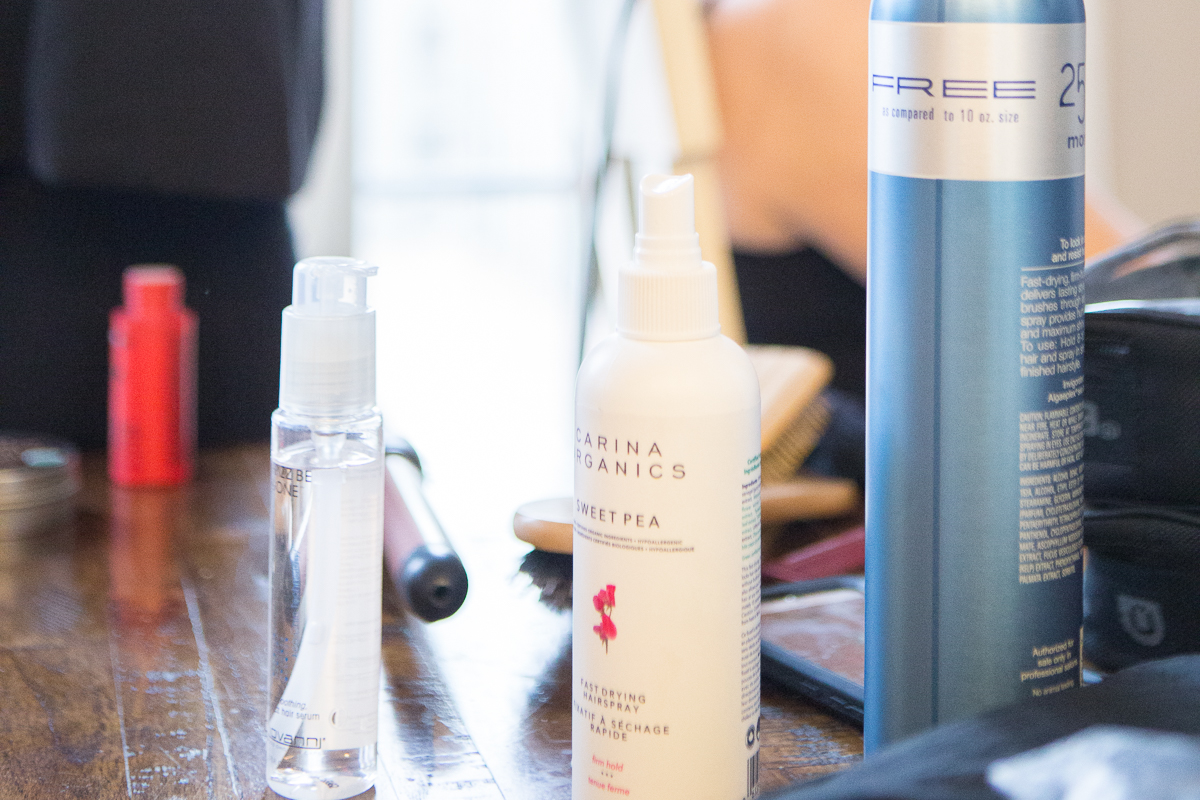

So, to Recap…
There are two main paths to reducing clutter in your images: Blur it out, or Cut it out. Blurring it out involves getting a little better understanding how to reduce your depth of feild (the in-focus part of your image). And cutting iti out involves paying attention to the surroundings and moving yourself, your subject, or the offending clutter to keep it outside the frame of your image.
Your turn, go try out these techniques! Contact me below with any questions, or just to connect. And of course if you are ready for updated portraits with no clutter by yours truly.
Connect with us on Social Media
Drop Me a Line Here...
Have a photography conundrum, or just want to chat? Contact me here!


